Setting up a Juniper EX2200-C with LACP
06.06.2013 - Louis Kowolowski - ~3 Minutes
Setting up a (brand new) Juniper EX2200c (the 12 port fanless version of the EX2200) to use LACP with a Mac Pro.
This will cover firmware updates, initial configuration (including some IPv6), and of course, LACP itself.
Setting up a new EX2200-C with LACP
After unpacking the switch, the first thing I do is take a picture.

Updating the firmware
Download the new firmware from Juniper Support. An account is required to access the downloads. You can create one and register a single device to get access to the firmware updates. Copy the compressed file (something like jinstall-ex-2200-12.3R2.5-domestic-signed.tgz) to /var/tmp on the switch:
[louisk@desktop ]$ scp jinstall-ex-2200-12.3R2.5-domestic-signed.tgz user@switch:/var/tmp/
Login to the switch and run:
user@switch> request system software add /var/tmp/jinstall-ex-2200-12.3R2.5-domestic-signed.tgz
user@switch> request system reboot
I also ensure that I configure at least one NTP server so that any log messages from the switch are date/timestamped correctly. You can find some of your own entries by doing a dns lookup of ‘pool.ntp.org’.
set system ntp server 64.246.132.14
set system ntp server 2001:19f0:1590:5123:1057:a11:da7a:1
Some basic security precautions:
set system services ssh root-login deny-password
set system services ssh protocol-version v2
set system services netconf ssh
I also run IPv6 on as much of the network as possible (1, its unavoidable, and 2, its good practice for the future).
Configuring an LACP link on the Juniper
Here, we define both of our interfaces as 802.3ad (this is the IETF designation for LACP link aggregation) and specify the name of the aggregate port we will use. After that, our configuration directives are done on the aggregate port, not the physical ports. Here, we define the options we wish to use for LACP. Finally, we set the port up for ethernet-switching (if we are using VLANs, we would need to put the port in trunk mode. If not, we can simply assign the port to a vlan in the vlan section of the config.
set interfaces ge-0/0/10 ether-options 802.3ad ae0
set interfaces ge-0/0/11 ether-options 802.3ad ae0
set interfaces ae0 description "Mac Pro"
set interfaces ae0 aggregated-ether-options lacp active
set interfaces ae0 aggregated-ether-options lacp periodic slow
set interfaces ae0 unit 0 family ethernet-switching
Configuring an LACP link on OS X
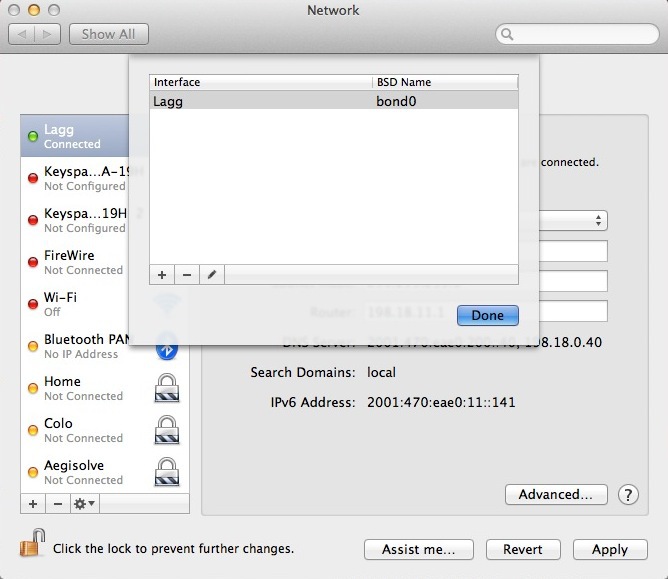
In system preferences, choose network. Choose the gear-dropdown and then “Manage Virtual Interfaces”. Click ‘+’. Choose a name for the aggregate (I chose ‘Lagg’), and select the interfaces you wish to participate (I chose Ethernet 1 and Ethernet 2). Click done. Click done. You can now configure your IP address(es) as normal.
OS X Lagg Interface Creation

OS X Virtual Interfaces
OS X Lagg Status
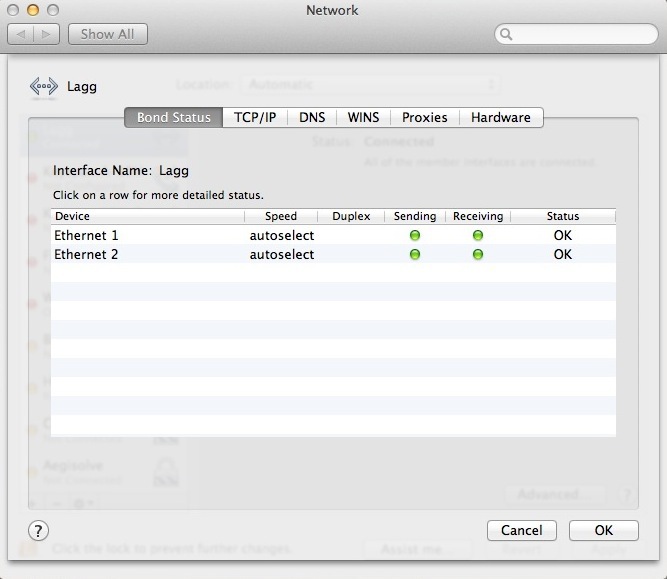
You should see that the status on the mac is green for both interfaces.
You now have redundant connections, and, depending on what you’re doing, the ability to copy information at > 1 Gbit.